
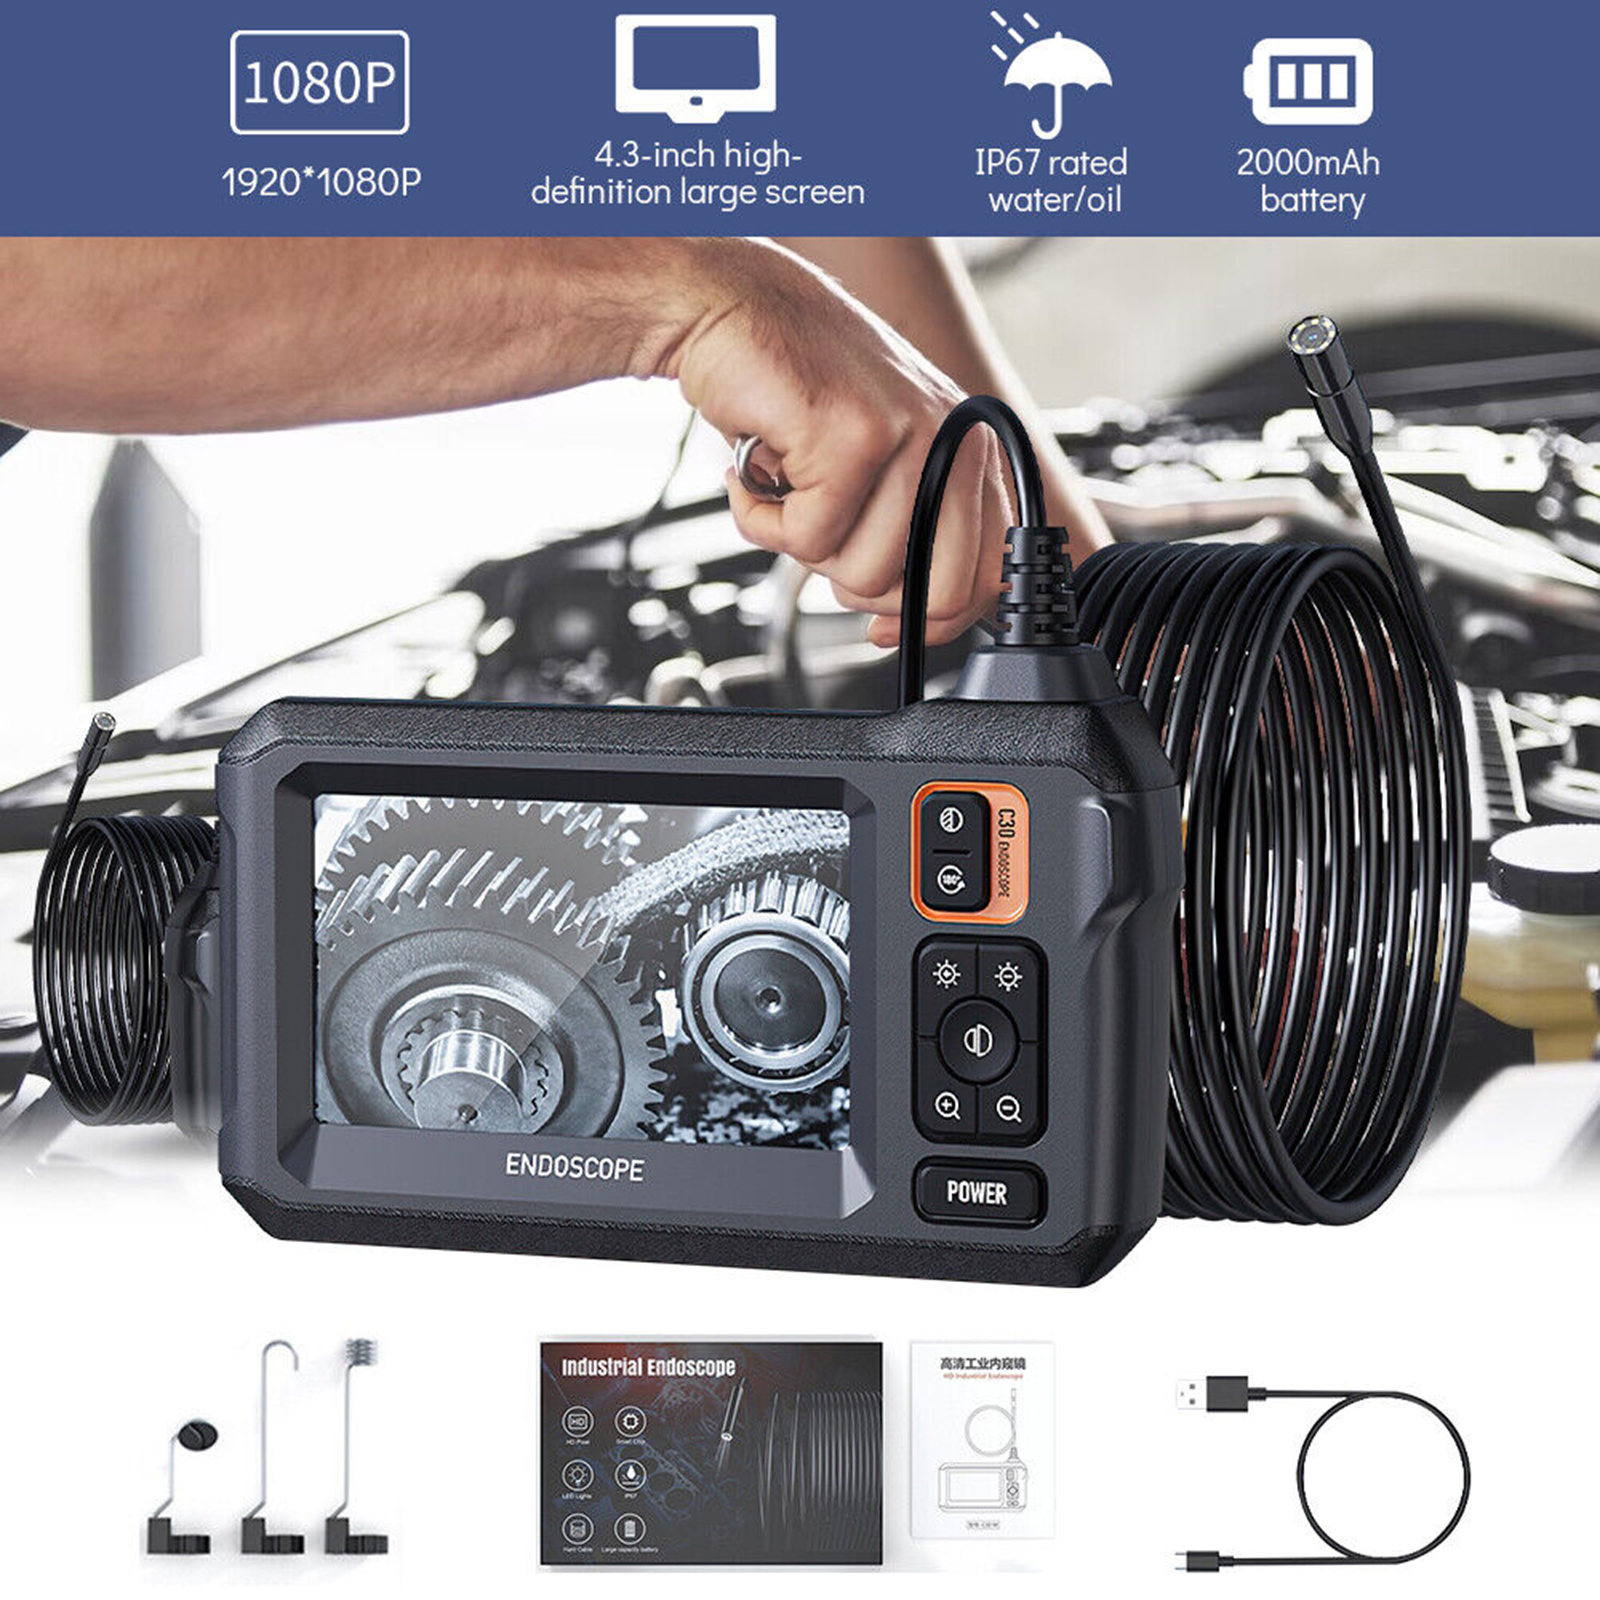


Industrial Endoscope with 4.3-Inch Screen, 8 LED Lights, 8mm Lens, and Inspection Camera for Pipe Automotive Black,
How to Use the Borescope 4.3-Inch Screen Industrial Endoscope
Step 1: Charging the Battery
- Connect the endoscope to a power source using the included USB cable.
- Wait for the battery to fully charge. This typically takes around 3 hours.
- Once fully charged, disconnect the endoscope from the power source.
Step 2: Turning On the Endoscope
- Press and hold the power button located on the control panel of the endoscope.
- The 4.3-inch screen will light up, indicating that the endoscope is turned on.
Step 3: Adjusting the LED Lights
- Use the buttons provided on the control panel to adjust the brightness of the LED lights.
- Press the “+” button to increase brightness and the “-” button to decrease it.
- Make sure the LED lights are set to the desired level for optimal visibility.
Step 4: Using the Flexible Cable
- Insert the end of the flexible cable with the small 8mm lens into the area you want to inspect.
- Bend and mold the cable to navigate through narrow spaces and reach hard-to-reach areas.
- The camera at the end of the cable will capture real-time images and display them on the screen.
Step 5: Observing and Recording
- Observe the images displayed on the 4.3-inch screen.
- If needed, use the buttons on the control panel to adjust the zoom level for a closer look.
- If you wish to record the inspection, insert a micro-SD card into the provided slot.
- Press the record button to start recording, and press it again to stop.
Step 6: Turning Off the Endoscope
- Press and hold the power button on the control panel for a few seconds.
- The screen will turn off, indicating that the endoscope is powered off.
Step 7: Cleaning and Storage
- After use, detach the flexible cable from the endoscope.
- Gently clean the lens and cable with a soft cloth to remove any dirt or debris.
- Store the endoscope and its accessories in a safe and dry place for future use.
, ,



Reviews
There are no reviews yet.